
Skype type mixing station installation manual
This manual is suitable for technicians with certain installation experience to install 25m3/h mixing station, 35m3/h mixing station, 50m3/h mixing station, 75m3/h mixing station, and only provides detailed installation guidance.
Step 1:
Place the mixer on a horizontal surface and fix the loading rack to the mixer with suitable bolts;
Loosen the fixing screws on the upper rail of the hopper, tilt the upper rail inward. And use a crane to lift the hopper into the loading rack track. reset the upper rail and tighten the fixing screws.
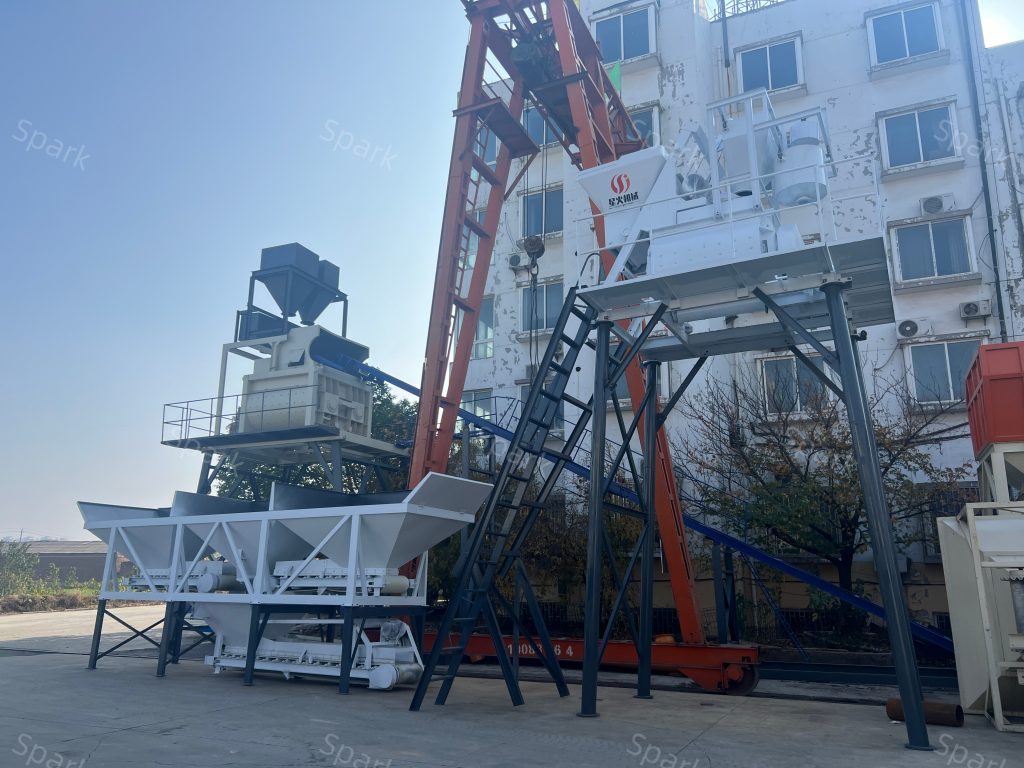
Step 2:
Hang the four legs of the mixer at the four corners of the main platform and fix them with long bolts (note that the bolts cannot be tightened); install the diagonal brace between the legs, and do not tighten the diagonal brace screws for the time being. Install the first-level platform and guardrail.
Step 3:
The crane slowly lifts the mixer 1.5 meters. At this time, pull up the main machine legs and install the main machine material receiving port. After the installation is completed, continue to lift the main machine until the legs are off the ground. At this time, tighten the diagonal braces between the legs, tighten the bolts between the legs and the chassis flange of the main frame, and connect the four diagonal braces between the platform and the legs.
Step 4:
Fix the mixer and hoist it to the foundation, place it according to the drawing size, require the overall level, and cannot be tilted. Pay attention to the embedded iron between the legs and the foundation, and do not weld it for the time being.
Butt joints require that the plane after docking cannot be bumped. The connecting feet in the pit are placed on a solid plane.
Step 5:
Straighten the upper hopper frame, connect the wire rope between the lifting motor and the hopper through the steering wheel, and check the reinforcement.
Step 6:
Lift the two-layer platform and each metering part according to the configuration requirements, and pay attention to reinforcement.
Part 7:
Assemble the cement silo on the ground. If it is detachable, it needs to be assembled in advance. It is recommended to install the cement silo legs on the ground, and the diagonal brace bolts between the four legs and the legs must be tightened. The arch damage of the cement silo and the material level, ladder, cement feed pipe and other auxiliary materials are assembled on the ground. If the cement dust collector is electric. The cement silo needs to be hoisted into place after it is hoisted to the foundation to avoid damage.
Step 8:
Before hoisting, it is necessary to measure whether the position of the screw conveyor is appropriate. If not, it is recommended to correct it before hoisting. Weld the cement silo legs to the pre-buried iron of the foundation.
Step 9:
After the screw conveyor is installed. It is necessary to cut a piece of cement blank with the same diameter as the feed pipe at the corresponding position of the cement weighing tank. And weld the feed pipe to the weighing tank. Note that before welding, the ground wire of the welder should be connected to the weighing tank to prevent damage to the sensor during welding. After completion, use a soft connection to connect the discharge port of the screw conveyor and the feed port on the weighing tank. Weld the main machine legs to the pre-buried iron of the foundation.
Step 10:
Assemble the batching machine. If it is a four-bin batching machine, the two sections need to be assembled together in advance.
Then use a crane to lift the entire batching silo and slowly place it on the weighing bucket. The worker connected the weighing hopper and the batching bin with the sensor hanging wire. And then lifted the batching bin. At this time, the weighing hopper was also lifted together.
Install the batching machine legs. Place it in the basic position according to the drawings, and do not weld the batching machine for the time being.
Step 11:
Arrange the control room according to the electrical drawings, lay the cables between the components. And put the hopper into the pit after completion. Actually check whether the batching machine is in a suitable position. And weld the batching machine legs and the pre-buried iron of the foundation.
Step 12:
Test the machine